In the world of design, precision matters. Whether you’re creating a logo, a marketing poster, or a complex infographic, your visuals need to be sharp, scalable, and professional. That’s where vector tracing steps in, a powerful yet often misunderstood technique that goes far beyond simple image conversion.
From designers and marketers to small business owners, mastering vector tracing can elevate your creative output. This guide dives deep into the power of vector tracing, why it’s crucial in design and marketing, and how you can leverage it for better results.
Why Vector Tracing Matters in Design and Marketing
In modern design, precision drives success. Blurry, pixelated visuals can weaken your brand’s credibility and impact. This is where vector tracing becomes essential, ensuring your designs remain crisp, clear, and professional.
1. Crisp, Scalable Graphics
Vectors are resolution independent, which means that they can enlarge or shrink to various sizes without losing detail. Whether you are designing a business card or a huge billboard, your visualizations will always be crystal clear.
2. Flexible Design Edits
Vector paths allow easier adjustments. Want to change a shape, twist a curve, or refine a logo? Vector tracing makes the editing process effortless and smooth.
3. Print-Ready Designs:
Commercial printers need high-resolution files, which ensure sharp output. Vector tracing of artwork makes sure that the artwork complies with these standards, so that the work is not blurry or distorted when printed.
In marketing, consistency is key. From web banners and email headers to physical merchandise, vector tracing ensures your creative assets look flawless across all formats.
How It Goes Beyond Simple Image Conversion
Many assume vector tracing is just about redrawing an image, but it’s far more powerful.
Although some image converters can only trace over shapes, the actual vector creation process will recreate every detail, curve, line, and angle. This enables designers to clean up imperfections, remove background disturbances, or enhance clarity.
For example:
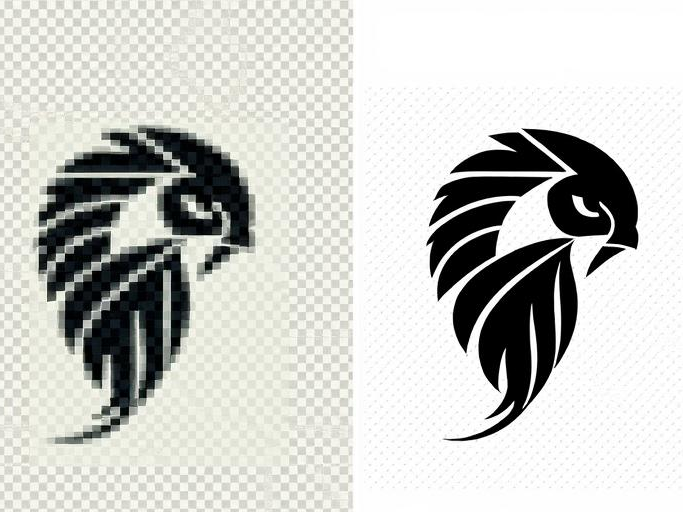
- A blurry logo can be vector traced to restore its sharpness.
- Complex artwork can be simplified into scalable paths.
- Detailed illustrations can be cleaned and optimized for digital or print use.
Vector tracing doesn’t just copy an image, it refines and enhances it.
Vector Tracing: What Is It Really?
Basically, vector tracing is the process of converting raster images into vector graphics.As raster images are made of pixels, vector graphics are composed of points, lines, and curves. The transformation works wonders in keeping the designs looking sharp and professional.
Vector images aren’t based on pixels but on mathematical equations, which makes them infinitely scalable without any loss of quality. This prevents blurry logos or jagged edges when resizing.
In simple Terms
- Raster Image: Built with pixels (e.g., JPG, PNG). Enlarging often results in blurry or distorted visuals.
- Vector Image: Created with mathematical paths (e.g., SVG, EPS). Stays crisp, no matter how large or small you scale it.
Vector tracing ensures every design element, from intricate curves to detailed text, remains clean and accurate. For businesses that rely on sharp logos, infographics, or promotional materials, this precision is invaluable. Whether you’re printing a tiny label or designing a billboard, vector tracing keeps your visuals flawless.
Vector Tracing vs. Image Conversion: The Key Difference
Although vector tracing and image conversion sound similar to each other, they fulfill different purposes in design. Therefore, understanding these differences is vital in producing good visuals.
1. Image Conversion
Image conversion involves changing a file format, for example, converting a PNG to a JPG or a BMP to a GIF. This process doesn’t improve image quality but serves specific purposes:
(i) File Compression
Image conversion reduces file size, making images easier to upload and share. However, excessive compression may lead to quality loss.
(ii) Format Adaptation
Converting files allows compatibility across different platforms, ensuring images display correctly.
(iii) Basic Editing
Some image converters offer resizing, cropping, or color adjustments, but they won’t enhance overall sharpness or precision.
2. Vector Tracing
Vector tracing is a more advanced process that recreates an image using mathematical paths instead of pixels. This offers significant benefits:
(i) Scalability
Vector graphics remain crisp and clear, whether on a business card or a massive billboard.
(ii) Precision
Vector tracing enhances details, ensuring smoother curves, sharper edges, and cleaner lines.
(iii) Flexible Editing
Vector files let you modify individual elements like colors, shapes, or text without losing quality.
In short, image conversion helps manage file types, while vector tracing transforms visuals into scalable, professional-quality graphics.
How to Convert an Image Into a Vector

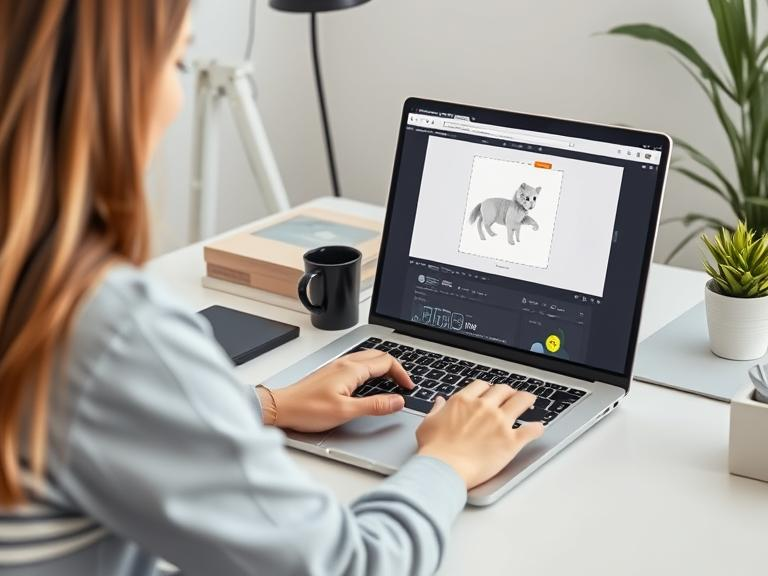
Many tools and apps can convert images to vectors. Let’s use Illustrator as an example. Here’s how to convert an image into a vector in a few simple steps:
1. Open Your Image in Adobe Illustrator
Begin by launching Adobe Illustrator and creating a new file. Ensure your artboard dimensions suit the size of your image. Next, go to File > Place to import your image onto the artboard. Once placed, you may need to resize or reposition the image for better workspace organization.
- High-Resolution Images Work Best: Clear, sharp images ensure smoother vector tracing. Blurry or pixelated files can lead to rough edges and inaccurate paths.
- Avoid Cluttered Backgrounds: Clean backgrounds improve tracking accuracy by reducing unwanted shapes or noise, helping Illustrator focus on key design elements.
2. Open Image Trace Panel and Enable Preview
Once your image is ready, open the Image Trace panel by navigating to Window > Image Trace.
With your image selected, check the Preview box in the Image Trace panel. This allows you to see real-time updates as you adjust tracing settings, saving time and guesswork.
For optimal results:
- Zoom In on Details: Viewing your image at different zoom levels helps spot imperfections and areas that need refinement, ensuring precise vector tracing.
- Start with Default Settings: The default trace settings usually offer a reliable starting point, allowing you to make targeted adjustments for better results.
3. Choose a Preset or Adjust Settings
Illustrator offers several presets that simplify the vector tracing process. If you prefer quick results, explore these options first.
- High Fidelity Photo: Produces highly detailed, lifelike vector results.
- 3 Colors / 6 Colors: Ideal for simplified, posterized designs.
- Black and White Logo: Perfect for bold, high-contrast artwork.
For manual control, tweak the following settings:
- Mode: Choose Color, Grayscale, or Black and White depending on your design needs.
- Threshold: In Black and White mode, this controls which areas are interpreted as black or white.
- Paths, Corners, and Noise: Adjust these settings to refine details, smooth curves, and reduce unwanted elements.
4. Trace and Expand the Image
Once satisfied with your preview, uncheck the Preview box and click the Trace button to apply your settings.
To fully convert your image into vector paths, go to Object > Expand and click OK. This action reveals individual blue outlines representing each vector path.
For better control over your design:
- Use the Direct Selection Tool (A): This tool allows you to adjust individual anchor points, improving the accuracy of your vector design.
- Clean Up Unwanted Elements: Removing stray points or shapes that were unintentionally traced keeps your design clean and professional.
- Group Key Elements: Grouping related paths not only simplifies editing but also ensures your design stays organized, especially for complex illustrations or logos. This step enhances control when resizing or adjusting specific parts of your vector graphic.
5. Refine and Export
After expanding, right-click your vectorized image and choose Ungroup to break it into individual shapes for easier editing. You can now adjust colors, reposition elements, or refine details as needed.
Before saving, ensure your design is clean and precise.
- Save as SVG for Web Use: SVG files are ideal for web graphics, offering sharp visuals at any size.
- Save as EPS for Printing: EPS files ensure high-resolution prints, perfect for logos and large-format designs.
Popular Uses of Vector Tracing in the US Market
Vector tracing is the premium approach across different industries because of its accuracy and scalability. From small startups to big companies, vector graphics are the most relied-upon quality control measures in advertising.
1. Logo Design
From business cards to billboards, vector tracing keeps logos sharp and clear. This flexibility proves to be important in retaining brand identity.
2. Signage & Banners
Large-level visuals need precision, and vector tracing allows text, icons, and graphics to be crisp and clear, even on huge prints.
3. Infographics & Data Visuals
Vector tracing cleans and scales complex data visuals for presentation. Whether digital or print, vectors yield the sharpest results, and give visuals the maximum punch.
With striking visual appeal at stake in marketing, vector tracing gives a professional edge to any image across any platform.
Choosing the Best Vector Tracing Software for Your Needs
Choosing a nice vector tracing software works wonders to support your design process and could mean a huge difference between a good and great result. Being a professional or novice, with the right tool, one essentially guarantees precision, efficiency, and great results.
Best tools for designers and beginners
1. Adobe Illustrator
This is regarded as the gold standard for any vector tracing within the industry; with advanced functions including Image Trace for conversion at a high degree of detail, customization traits provide a playing ground for very serious designers.
2. CorelDRAW
Specially appreciated for its easy learning curve and flexibility, this software provides good tracing tools that ease the process of vectorization. It is the way to go for graphic artists concerned with a diverse range of projects.
3. Inkscape
It packs serious power for vector tracing and comes as free and open-source software. The program’s very low price tag has, therefore, made it trendy among beginners or freelancers.
4. Vector Magic
This software runs very fast, automatically vectorizing images in an intuitive interface. It works great for those that need to get results fast and don’t want to waste time on fine-tuning different options.
All of these tools have unique strengths and should be chosen based on your design needs, budget, and training level.
Vector Tracing Online: Quick Solutions for Designers
For designers seeking fast results, online vector tracing tools provide a convenient solution. These platforms are ideal for quick image conversions without the need to download software.
Top Online Platforms for Fast Vector Tracing:
1. Vectorizer.io
This user-friendly platform offers precise control over tracing settings, making it perfect for detailed designs. Users can adjust color limits, smoothing options, and more for optimal results.
2. Autotracer.org
A simple yet effective free tool that’s great for converting basic designs. It supports multiple file formats and offers a straightforward interface for quick vectorization.
3. Picsvg.com
Specializing in logo and icon conversion, this platform excels at creating clean SVG files. It’s ideal for turning simple images into scalable graphics.
Online tools save time, but dedicated software offers unmatched customization for professional results.
Infographic Design Made Easy with Vector Tracing
Infographics thrive on clear visuals, and vector tracing simplifies the process. Designers can work with analytic, scalable, varied, and sharp images that will always remain clear and bright on every kind of canvas by converting pixelated images into scalable vector graphics.
1. Clean Lines and Sharp Details
Vector graphics are built using mathematical paths, ensuring each line, shape, and icon appears crisp. Precision plays a key role in intricate infographics with such things as complex charts, diagrams, or illustrations. Vector designs, unlike pixel-based images, stay sharp no matter the zoom-in or resize amount used.
2. Easy Scalability for Web or Print:
Infographics are the kind of material that travel across multiple platforms, from social media feeds to huge conference posters. Vector graphics adjust well to this variance of size without any distortion, ensuring that your design looks exquisite in any size, whether on a mobile screen or a huge banner.
3. Improved Text Clarity for Data-Heavy Designs:
Infographics often rely heavily on text to explain data points. Vector tracing ensures that every label, title, and caption remains sharp and readable. This is especially valuable for intricate data visualizations that combine multiple text elements with graphics.
A well-designed infographic using vector tracing ensures your message is clear and impactful, whether viewed on a smartphone, laptop, or conference screen.
Final Thought
Vector tracing, after all, is the key to sharp and scalable designs. If you are using vector tracing software to create detailed projects or choosing vector tracing online tools for faster results, both methods give you a deserved solution. When it comes to designers producing data-laden visuals, mixing vector tracing with a reliable infographic design app leads to clear, professional-quality graphics. Once you master these tools, they will allow you to increase design accuracy, enhance workflow efficiency, and provide visuals shining through on digital and print surfaces.