Have you ever recorded the perfect video or podcast but couldn’t hear your voice over the background music? Don’t worry; this happens to everyone.
Background music can be a problem in YouTube gaming clips and podcast recordings. The good news is that AI-powered tools now remove background music quickly and. These tools process a 5-minute video in just 45 seconds. They work with all popular formats like MP3s, WAV files, MP4s, and MKVs.
The technology has improved substantially with new source separation tools that split vocals from music effectively. You can choose different intensity levels, from mild to aggressive, based on your needs.
Want to clean up your audio without expensive software or technical skills? Look at the best free tools and proven techniques for crystal-clear sound.
Can You Really Remove Background Music?
You’ve spent hours recording the perfect voiceover. Then you find out the background music drowns out your words. The good news? You don’t need to start over. Today’s tech gives you options that didn’t exist a few years ago, but you should know their limits.
1. At the time of removal works, and when it doesn’t
Background music removal isn’t a one-size-fits-all fix. Results depend on a few key factors:
- Audio quality: Higher-quality input files (320 kbps MP3 or lossless formats like WAV/FLAC) give better results.
- Separation between sounds: Clear differences between vocals and music make separation easier.
- Type of background noise: Simple background noise (like hiss or hum) comes out easier than complex musical arrangements.
The best results come from files where instruments or vocals stand apart. You should avoid recordings where frequencies mix too much. Music removal works better when vocals and instrumental tracks use different frequency ranges. That’s why removing background music from speech usually works better than splitting vocals from a pro music mix.
However, removal gets tough when heavily compressed audio or when vocals and music share frequency ranges. On top of that, it’s almost impossible to separate everything when the original recording has reverb or echo effects on both music and vocals.
2. Why is vocal and music separation tough
The tech hurdles in splitting vocals from music come from basic audio principles. Sound often “bleeds” between tracks in studios, even with acoustic isolation between rooms. It creates several issues:
- Overlapping frequencies: People’s voices and instruments often use the same frequency ranges, which makes clean separation hard.
- Spatial domain issues: Perfect phase cancellation rarely works, even with the original music track, because room reverb changes how sound waves mix.
- Label noise and data inconsistencies: AI systems need quality training data to split audio well. One model improved by almost 1dB by using extra high-quality training material.
Movies and pro-mixed music pose special challenges. Their dialogue, sound effects, and music blend to create one experience. Splitting these without artifacts gets tricky.
3. How AI Tools Changed Everything
AI advances have transformed what’s possible. Today’s AI-powered tools use smart techniques that go way beyond old-school noise reduction:
- Machine learning algorithms analyze noise patterns and track changes in real time.
- Neural networks process dialog isolation fast and separate music stems with high quality.
- Deep learning splits vocals and instruments using non-negative matrix factorization and independent component analysis.
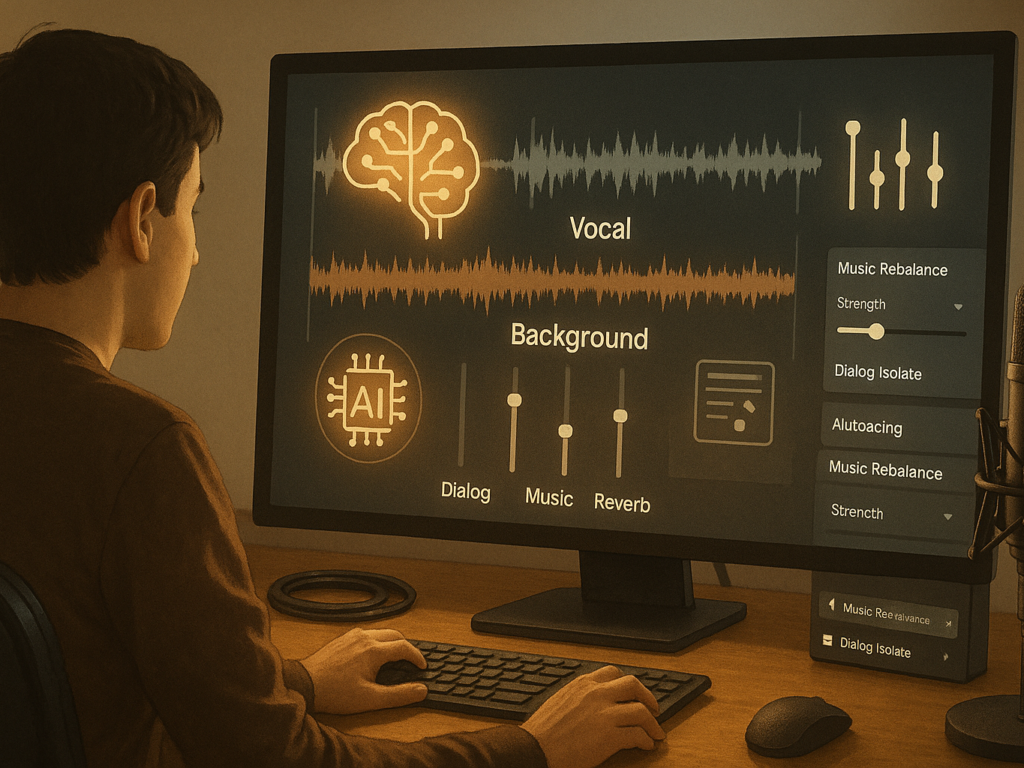
These tools can spot and remove background noise with amazing accuracy. They create clearer audio than ever. Advanced systems like iZotope RX 11 have special features like Music Rebalance and Dialog Isolate. These don’t just remove background music; they let you adjust the volume of vocals, bass, drums, or other instruments.
AI-powered tools now let you choose different processing levels from mild to aggressive. You can find the sweet spot between noise reduction and audio quality. The improvements are huge. What once needed pro studio gear now works through online tools available to more people.
All the same, perfect separation remains out of reach in many cases. Your results still depend on how complex the original mix is and how the vocals and music blend. That’s why knowing what’s possible before starting any background music removal project is smart.
Top Tools to Remove Background Music Online
Need a quick way to clean up your audio without being a pro editor? The right tools can transform your recordings by removing unwanted background music. AI technology has made this easier than ever, and you can now get great results from several free tools.
1. VEED.io: One-click removal with watermark
VEED may be the easiest way to remove background music from videos and audio files. Their Clean Audio tool runs on Dolby AI technology that automatically spots and removes unwanted sounds with a single click.
Here’s all you need to do:
- Upload your audio file to the VEED editor
- Click on your file in the timeline and select “Clean Audio.”
- Let the AI process your content
- Export your cleaned audio
VEED works especially when you have different types of noise beyond music, like wind, static, and ambient sounds. You can use it with all popular video formats like MP4, MOV, AVI, MKV, and standard audio formats.
The free version adds a watermark to your exports but gives you full access to noise-reduction features. VEED’s browser-based system lets beginners and quick-fixers remove background music online without installing anything.
2. Moises.ai: Advanced stem separation
Moises. AI takes audio separation to the next level with its powerful features. This tool started for musicians but does an amazing job at pulling apart different sound elements, making it easy to remove background music free and focus on the vocals or other components of the audio.
AudioI separates your audio iAudioistinct parts:
- Vocals (both main and background)
- Drums
- Bass
- Guitar
- Keys and other instruments
Moises stands out because it keeps audio quality intact during separation. You can process multiple tracks and download individual parts with the free plan. It makes it perfect for creating karaoke versions, practicing with instrumentals, or extracting vocals for remixes.
The tool also has great music features like chord detection, pitch changing, and BPM adjustment. Content creators love these extras to remove background music while keeping speech crystal-clear.
3. Audacity: Free desktop option with plugins
Audacity gives you a robust desktop solution that’s free and open-source. It needs more technical know-how than online tools, but lets you fine-tune every aspect of audio cleaning.
The basic features of Audacity are:
- Noise Reduction effect to handle constant background sounds
- Noise Gate to cut sounds below a certain level
- Notch Filter to remove specific frequency hums or whistles
You can make Audacity even better at removing background music by adding plugins. ReaFIR (from the free ReaPlugs package) works well in “Subtract” mode to clean up noise. Advanced users can also add RNNoise suppression plugins that work best with voice recordings.
Audacity’s biggest advantage is control, and you can study noise patterns, filter specific frequencies, and make detailed adjustments that one-click tools can’t match. But this power means you’ll need more time to learn the ropes.
These tools tackle the problem differently, finding their sweet spot between ease of use and control. If you’re looking for a way to remove background music free, your choice depends on how comfortable you are with tech and what you need to do with your audio.
Audioo Remove Background Music from a Video
Your video’s background music drowns out important dialogue. You need a quick way to clean up the audio. Audio tools simplify this process, unlike muting everything to preserve the voices.
1. Extract audio ffrom thevideo first.
You must separate the audio track from the visual elements to remove background music from a video. This first step creates an audio file you can edit on its own.
These free tools make audio extraction easy:
- Restream Audio Extractor: Upload your video file (MP4, MOV, MKV, WEBM, or AVI) and download the extracted MP3 without creating an account or installing software.
- Moises App: Open the app on your mobile, tap “+,” select storage location, pick your video, and the app extracts the audio automatically.
- Biteable Audio Extractor: Pick MP3 or WAV formats, upload your video (up to 500MB), then click “Extract audio” to get your file.
The extraction step gives you better control since most audio cleaning tools use audio files rather than video formats.
2. Use online tools or editing apps.
The extracted audio through specialized tools that separate vocals from music:
- Online AI separators: VEED.io offers the quickest way: upload your audio, Audio the sound icon to access audio controls, then mute the background or lower its volume with the slider. You can add new background music from their library after processing.
- Desktop editors: Audacity with plugins gives you more control. You can use noise reduction effects or advanced tools like Vocal Reduction and Isolation. Media.io‘s Audio Splitter uses AI technology to separate background music from voice.
- Mobile solutions: Apps like CapCut let you adjust noise reduction on your phone. Upload your video, tap Audio, Audio Noise Reduction, and slide to remove background noise.
AI-powered tools work better for complex mixes, while traditional noise reduction suits simpler backgrounds, making removing background music from a video easier.
3. Re-sync cleaned audio with Audioideo.
The final challenge is to put your cleaned audio into the video in perfect sync:
- Import both files: Add your original video and cleaned audio file to your editing software.
- Align carefully: Find distinct audio cues like claps or “p” and “b” sounds to match waveforms visually.
- Fine-tune timing: Your editing software lets you make frame-by-frame adjustments; some platforms use keyboard shortcuts (Option + arrow keys in iMovie) to shift audio steps.
Is the audio out of sync? You should tweak the speed. In iMovie, Control-click the audio and select “Show Speed Editor” to make small speed adjustments until everything syncs.
Pluraleyes can automatically match audio even after editing for professional results. Adobe Premiere users can select video clips and audio files, right-click, and pick “Synchronize” for automatic alignment.
The audio quality should stay consistent throughout; changes in background noise removal could make your video sound odd. Take time to ensure smooth transitions between different scenes or segments.
This three-step process, extract, clean, and re-sync, helps remove unwanted background music from videos while keeping the valuable vocals or dialogue intact.
How to Remove Background Music from Audio Files
Do you have an audio file with too much background music? Maybe it’s a podcast with loud intro music or a voice memo from a noisy café. Several powerful methods can help fix your audio without expensive software or technical know-how.
1. Use vocal isolation or noise reduction.
Today’s audio editing tools offer amazing features that separate vocals from background music:
Adobe Audition has special effects like Sound Remover and DeNoise that identify and remove background music from audio, and wanted audio elements. The quickest way to use Noise Reduction is to select a portion with only background noise to create a “noise profile.” You can then apply the effect to your entire recording. This approach works great with constant noise sources like hiss, hum, or steady background music.
Audacity (free and open-source) gives you multiple options:
- The Noise Reduction effect removes constant background noise when you select a noise-only section
- The Noise Gate effect reduces sounds below a certain threshold
- The Notch Filter targets specific frequencies (like a 50Hz hum)
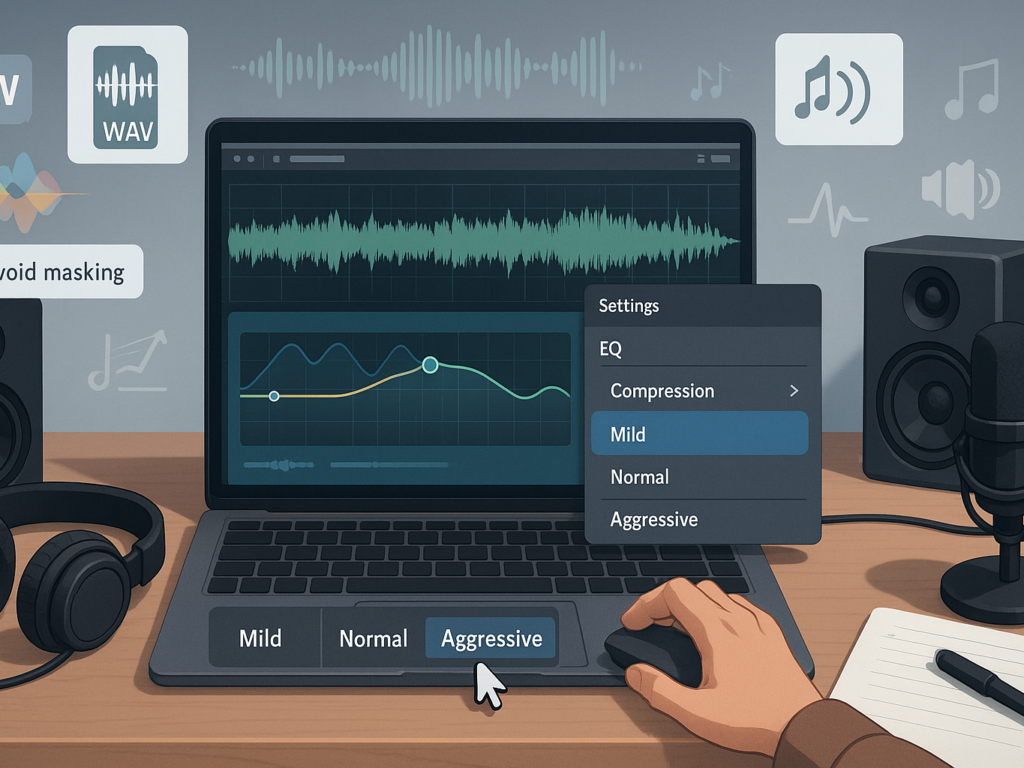
LALAL.AI Voice Cleaner stands out among online solutions. It isolates vocals from background music using next-generation source separation technology. The easy-to-use lets you:
- Preview the separated voice track
- Adjust noise canceling levels (Mild, Normal, or Aggressive)
- Export results in various formats
Media.io removes one-click background noise with MP3, WMA, and other common formats. The AI-powered system handles environmental sounds, static, and fan noise, making it easy to remove background music from audio.
2. Try phase inversion if you have the music track.
Phase inversion, a technique like in noise-canceling headphones, works great when you have the original background music track.
The process works this way: The original music’s phase gets inverted and combined with your mixed audio. Audioar music elements cancel each other out, which leaves only the voice or other desired audio.
Audioimitations:
- Music and voice must be completely separate
- Your musical track must exactly match the recording
- Random noise elements (like wind or crowd sounds) won’t go away
- Phase cancellation rarely works perfectly on the ground
One audio engineer says, “Phase cancellation only works completely if the two signals are 100% identical, sample for sample.” Background noise often changes faster and has random parts, so perfect cancellation rarely happens. You might still see some improvement, though.
3. Best formats to work with
Your audio file’s quality affects how well you can remove background music by a lot:
- Lossless formats (WAV, FLAC, AIFF) keep all original audio data and make separation more precise
- High-bitrate MP3s (320kbps) give good results with smaller file sizes
- M4A files balance quality and compression well
Stay away from heavily compressed audio formats. They mix frequency information in ways that make separation harder. Services like Descript work with multiple formats, including WAV, MP3, AAC, AIFF, M4A, and FLAC, which gives you flexibility with different projects.
Choose your export format based on what you’ll use it for:
- Further editing needs WAV or FLAC
- Web sharing works best with MP3 (192kbps or higher)
- Streaming services prefer AAC or OGG for efficient compression
The cleaner your input file, the better results you’ll get, whatever removal method you choose.
Tips for Better Results with Any Tool
You can get better results by tweaking a few settings after picking the right tool to remove background music. Even the best AI separation tools work better under ideal conditions. These practical tips will help you get cleaner separations, whatever method you choose.
1. Use high-quality input files.
Your source material’s quality is the foundation of successful background music removal. The old saying rings true: garbage in, garbage out. Files with higher quality give processing tools more data, which leads to a lot better separation. Here’s what you need for the best results:
- Upload files with higher bitrates (320 kbps for MP3) to capture greater detail and improve separation quality
- Choose lossless formats like WAV or FLAC since they keep the audio quality you need for precise stem extraction
- Start with the best audio source you can find to build a solid foundation for any processing
Yes, the quality of your original audio source is vital in determining final results, no matter how sophisticated the AI technology is. It becomes especially important with vocal-heavy content where you need crystal-clear sound.
2. Avoid overlapping frequencies
The biggest problem in removing background music comes from frequency masking when different sounds fight for the same frequency space.
Here’s how to minimize this issue:
- Pick tracks where instruments or vocals stand apart, staying away from those with heavy frequency overlap
- Use complementary EQ to carve out unique frequency spaces when working with similar-sounding elements
- Think over using sidechain compression to balance competing signals while keeping both audible automatically
Sounds clash when they compete for the same sonic space, creating what we call frequency masking. It makes separation tougher and leaves you with muddier results even after processing.
For example, when you export your cleaned audio, vocals and guitars often clash in the 1-4 kHz range. Audioight frequencies that define each element and give vocals a slight boost around 3 kHz while cutting back instruments in that same range.
3. Test different compression levels.
Getting the perfect balance between noise reduction and audio quality takes some trial and error:
- Make small changes step by step, listen to what you get, and keep improving until you hit your target
- Don’t overprocess and create new problems; only make changes that improve audio quality
- Try different noise-canceling settings, from mild (no extra compression) to aggressive (very heavy compression)
The most advanced tools come with multiple processing intensity options. LALAL.AI lets you adjust noise canceling to fit your needs: Mild for subtle changes, Normal for balanced results, or Aggressive for maximum separation.
Small, gradual changes work better than big adjustments. This approach keeps more of your original audio quality while slowly removing unwanted elements. Listen carefully after each change to catch any new artifacts that might be more distracting than the original background music.
Good audio repair should get the best possible result without obvious processing. Your changes should be invisible, not creating new distractions that sound worse than the original issue.
You’ll get much better results from any background music removal tool by using high-quality source files, managing frequencies strategically, and fine-tuning your compression settings.
When to Hire an Expert Instead
DIY tools can only take you so far, especially when you need perfect audio separation. Even the best free options might not work for professional projects because of quality and accuracy trade-offs.
1. Client projects or professional use
You’ll need professional audio editing in several specific cases:
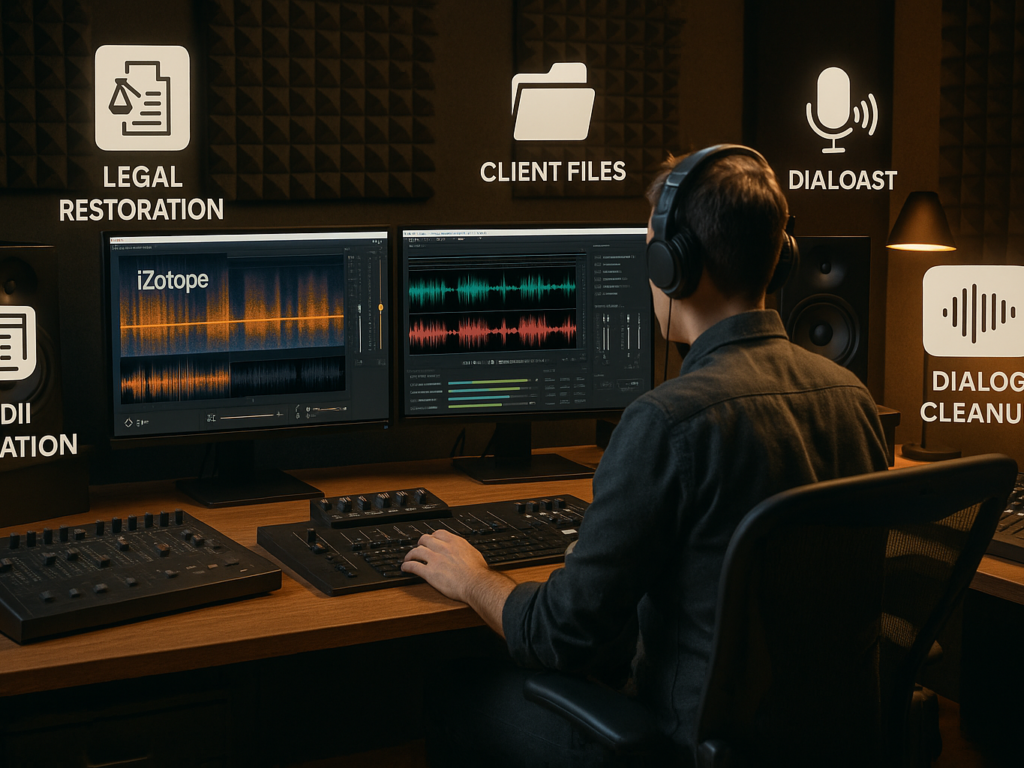
- Legal evidence: Audio recordings that might be used as evidence need professional restoration to hold up in court
- Client deliverables: Paid work where audio quality directly shapes client satisfaction
- Broadcast-quality content: Media meant for wide distribution needs clean, artifact-free audio
Professional editors bring specialized expertise to unique audio challenges that automated tools can’t handle well. It includes low mic rustle, clothing friction, wind noise, and intermittent RF dropouts. These experts create transparent results that listeners can’t detect.
2. Where to find audio editors online
You can connect with skilled audio professionals through several platforms:
- Fiverr/Upwork: These freelance marketplaces have audio editors starting around $25 per hour
- AirGigs: This specialized audio service marketplace focuses on noise reduction and audio cleanup
- Specialized studios: Companies like Media Medic dedicate their work to audio restoration and cleaning
Look for editors who have experience with your specific needs, whether podcast editing, dialog cleanup, or music restoration. Many pros highlight their use of specialized tools like iZotope RX, Adobe Audition, or Pro Tools in their profiles.
3. What to expect in terms of cost and quality
Professional audio editing prices usually follow these models:
- Hourly rates: $50-$200 per hour based on expertise level
- Per-episode rates: $100-$500 for podcast episodes, depending on complexity
- Monthly subscriptions: Regular content creators can get better rates through ongoing arrangements
Complex projects need about 6-8 hours of processing time for a one-hour recording. This time covers detailed work like removing filler words, balancing levels, applying EQ, compression, and specialized processing.
Professional quality makes a big difference. These experts don’t just remove background music; they boost overall audio quality through mastering techniques that automated tools can’t match. They also provide objective listening and valuable feedback that helps improve future recordings.
Final Thoughts
Background music removal has transformed from a complex technical challenge into a task anyone can handle. AI-powered tools let you remove background music and clean up audio without expensive software or technical expertise.
Your starting point largely determines success. The best approach is to use the highest-quality audio files and pick tools that match your needs. Quick fixes work well with online platforms like VEED.io and Moises.ai. Desktop applications like Audacity give you more control over handling complex projects.
On top of that, it helps to set realistic expectations. You might not achieve perfect separation with heavily mixed audio or poor-quality recordings. When your project needs broadcast-quality results, professional audio editors can step in to help.
Clean, clear audio makes your content more engaging and professional. Try working with a test file to explore different tools and settings. This approach helps you build a reliable workflow that removes background music while keeping your vocals or dialogue intact.