AI image editing is revolutionizing how creatives, marketers, and designers produce visual content. Thanks to advanced AI tools, making high-quality images is now quicker and easier. But, while AI can create stunning visuals, it isn’t always perfect. AI often makes errors like odd details or weird lighting, so you need to make manual fixes for a polished look.
Combine AI image editing with traditional methods. This helps you adjust colors, enhance details, and correct flaws. This approach guarantees a perfect alignment of your visuals with your creative vision. Blending AI efficiency with human skill gives great results. Whether you’re restoring AI images, fixing issues, or refining composition, this teamwork shines.
In this guide, we’ll show you how to combine AI tools with manual editing. You’ll find techniques to improve and fix your AI-generated visuals. You’ll also learn to restore AI images, fix errors, and make polished, professional content.
Why Combine AI Image Editing with Manual Adjustments?
AI image generators, such as Typeface, DALL-E, and MidJourney, are amazing. But they still have their flaws. AI-generated images can include unwanted artifacts, odd distortions, or incorrect details. Manual editing tools help correct these issues, improving quality. AI image restoration techniques can fix distortions and improve resolution. This makes visuals look more professional and polished.
Benefits of Combining AI and Manual Editing
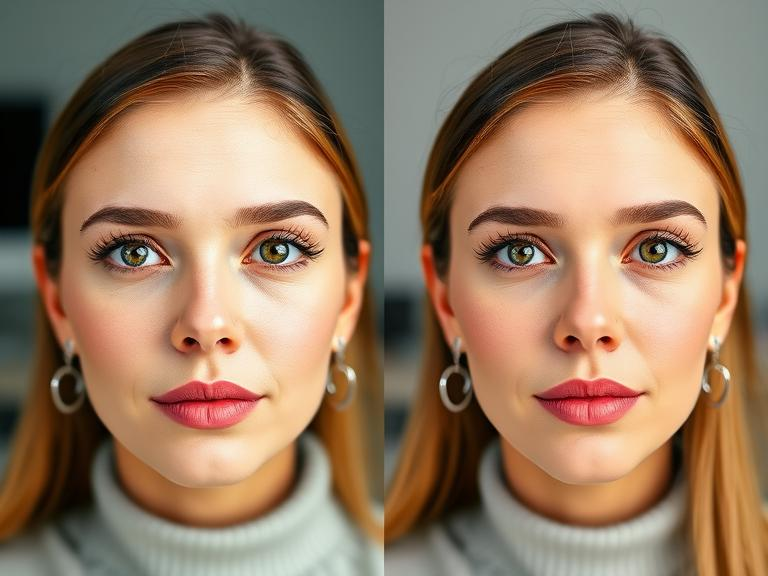
- Manual tools provide the ability to refine small details often missed by AI. This means we enhance facial features, sharpen text, and refine object edges for a polished image.
- Enhance AI visuals by incorporating custom effects, artistic overlays, or personal touches. These additions create unique designs. They connect with human feelings, making them relatable and engaging.
- Change the lighting, contrast, shadows, and colors to match your mood and style. This will improve the look of your space.
- Correct AI mistakes such as distorted faces, misaligned objects, or inaccurate proportions. Fixing these issues will make the final image look more real. It will seem both authentic and accurate.
Mixing AI image editing with manual tweaks gives you the best of both worlds. You get efficiency and precision for high-quality visuals.
Generate Your AI Image with Precision
To create a strong foundation, start with a precise AI image prompt. Using descriptive text and modifiers like “soft lighting” or “detailed texture” enhances results. A good prompt corrects your AI images. It cuts down distortions and boosts quality. This makes your outputs look more professional and appealing.
1. Using Typefaces Visual Inspiration Studio
Typeface’s Visual Inspiration Studio is a strong tool. It improves your AI image editing and helps you make high-quality visuals easily.
- Magic Prompt: This new feature enhances your basic descriptions. It automatically creates detailed AI prompts. This helps you generate more accurate and complex images to fit your needs.
- Reference Images: Pick visuals that match your vision. This helps the AI create designs that boost creativity. It also ensures the final result shows your style and aesthetic.
Using these tools, you can create clear AI images that need little fixing. This saves time and improves accuracy. It also cuts down on the need for AI image restoration or manual adjustments.
2. Identifying and Fixing Common AI Image Flaws
AI images often have flaws. These need manual fixes for a polished, professional appearance. Understanding these flaws is crucial when working with AI image editing tools.
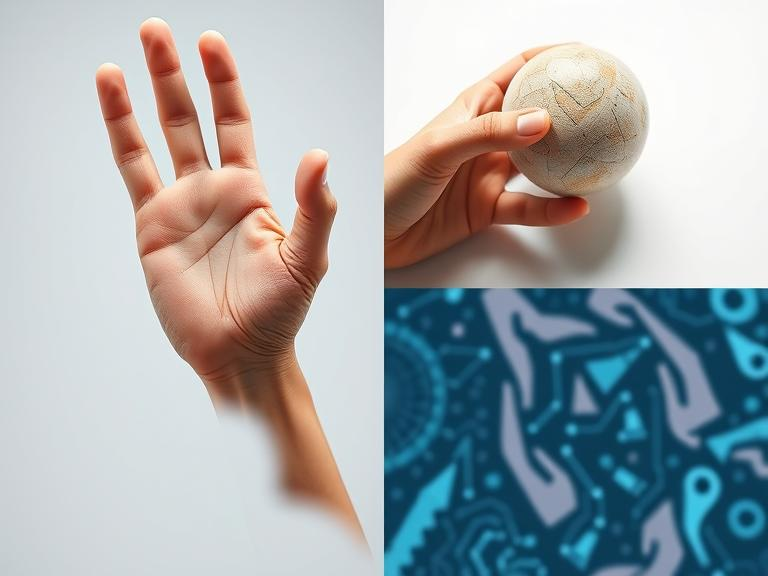
- AI struggles with faces and hands: it often can’t create realistic faces or hand positions. This can lead to extra fingers, uneven faces, or odd hand gestures that look unnatural.
- Blurred Edges: Objects might have smudged or unclear outlines. This can make the image look unfinished or less sharp.
- Incorrect Proportions: AI-generated objects may look stretched, squished, or off scale. This can disrupt the image’s composition.
- Lighting and Shadows Issues: AI can get lighting angles wrong. This mistake can cause shadows to fall in odd directions. It can also make objects appear with an unusual lighting effect.
- Too Smooth Textures: Some AI-created materials, such as skin, fabric, or metal, may appear overly smooth. They may seem plastic-like and miss out on natural details.
3. Solution: Correct Your AI Images with Manual Editing
To fix these issues, use professional tools like Photoshop, GIMP, or Lightroom. Change lighting for a real look. Sharpen any blurry edges. Also, refine textures to make images feel natural. Additionally, AI images restoration tools can enhance missing details and improve clarity. Combining AI speed with manual adjustments ensures high-quality, visually compelling results.
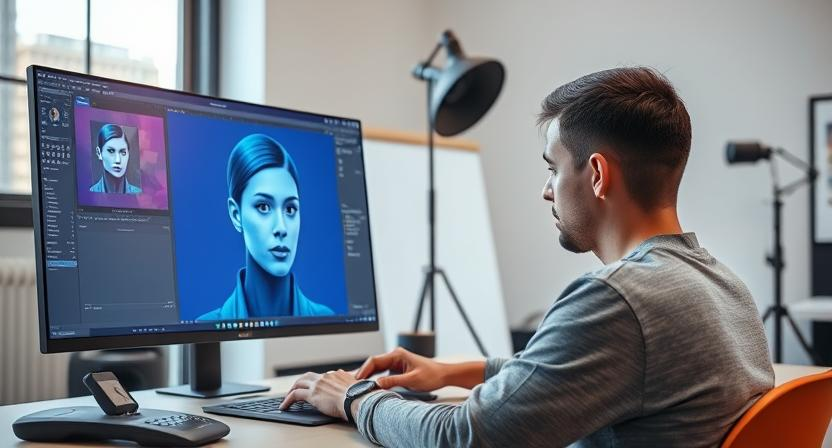
Using Typefaces Editing Tools for Precise Adjustments
Once you have an AI-generated image, the next step is refining it to eliminate flaws, adjust composition, and enhance visual appeal. Typeface offers a range of AI-powered editing tools designed specifically for correcting AI-generated images while maintaining natural aesthetics.
1. Select Tool (Inpainting and Erasing)
AI-generated images are amazing, but they can have flaws. You might see extra fingers, strange facial features, or twisted backgrounds. AI image editing tools, such as the Select Tool, allow you to fix these issues without difficulty.
This tool helps you find parts of an image to focus on. It lets you create professional visuals quickly, without wasting hours on manual fixes.
- Automatic Segmentation: This feature is incredibly useful when trying to fix AI-generated errors. The segmentation tool finds important parts of your image, like people, objects, and backgrounds. This helps you focus on areas that need work. For example, if the tool detects a distorted face, it can choose the facial area. This way, it won’t affect the rest of the image, making your corrections easier to focus on.
- Brush Tool: Once you spot the areas needing work, use the Brush Tool for precise adjustments. It gives you control over the areas you want to fix. For example, you might want to fix a misaligned mouth or add more detail to a blurry hand. The Brush Tool lets you pick specific areas. You can then apply targeted corrections.
Example Workflow
- Choose the Distorted Feature: Start by picking a distorted part of the image, like an odd eye or crooked mouth. The Select Tool helps pinpoint exactly where to make adjustments.
- Erase Unwanted Elements: Use the Erase Tool to get rid of unwanted artifacts in the image. For instance, if a face has an odd feature, removing it allows you to recreate it with more natural details.
- Use AI for Regeneration: Once the distortion is gone, use AI to fix the areas. You can use prompts like “add realistic eye details” or “refine smile.” This helps the AI create more accurate and lifelike features.
Mix AI image editing with manual tweaks. This way, you can fix your AI-generated images. They will look more human and professional, not robotic or unnatural.
2. Extend Tool (Outpainting)
Sometimes, your AI-generated image might need more space. This is especially true when you resize it for banners or ads. The Extend Tool (also known as outpainting) is perfect for this purpose. It helps you smoothly extend the image’s borders. This keeps everything looking consistent and cohesive.
The Extend Tool helps you stretch backgrounds. It keeps texture, color, and pattern in harmony. It’s perfect for enlarging your image or adding space. It won’t warp proportions or ruin the design.
Example Workflow
- Imagine you generate a product image, but it’s too cropped for a website banner. Use the Extend Tool to grow the background. Keep the product centered instead of starting the whole image over.
- The AI smartly fills in the background. It uses the same color and texture, blending the new area with the original.
This tool is a great way to correct your AI images without losing the integrity of the original design.
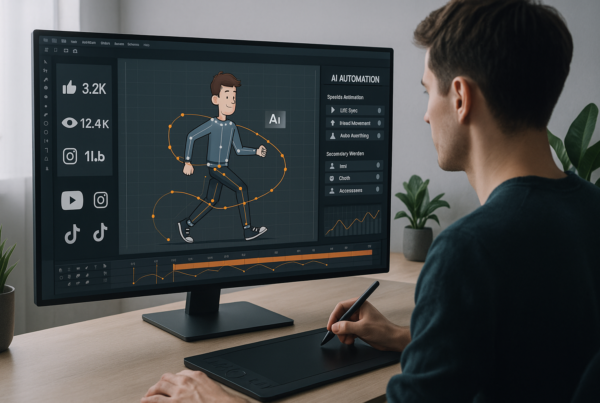
3. Auto-Crop for resizing.
Every platform, from social media to websites, requires specific image dimensions. Manual cropping can be tedious, but the Auto-Crop tool simplifies this process. It quickly resizes images to fit preset aspect ratios. This optimizes them for platforms like Instagram, YouTube, and Facebook. This ensures that your AI image restoration remains consistent across all formats.
The Auto-Crop tool resizes images automatically. It keeps key elements, like the subject or focal point, in focus. This tool adjusts images for different formats. Whether it’s Instagram’s square (1:1), YouTube’s landscape (16:9), or a Facebook ad (4:5), you will get the best framing.
Example Workflow
For example, you need an AI-generated photo for Instagram. The Auto-Crop tool keeps the subject centered and well-framed. You don’t have to adjust the crop for each platform manually. It works for any format. This saves you time and effort, allowing you to focus on creating more content.
4. Auto-Edit (Lighting and Shadow Adjustments)
Lighting is a critical element that can make or break an image. However, AI doesn’t always get lighting right. The Auto-Edit feature balances shadows and highlights. It creates different lighting options so you can choose the best one. This tool helps make your AI-generated images, like products or portraits, look more lifelike and polished.
The Auto-Edit tool fixes lighting issues. It balances shadows and highlights for a more realistic appearance. This is really helpful for product photography. Good lighting affects how people see the item’s quality.
Example Workflow
Let’s say you generate a product image, but the lighting looks flat. Use the Auto-Edit tool to add realistic shadows and highlights, making the product pop.
Choose the lighting version that fits your brand’s style. This creates a professional look that connects with your audience.
5. Effects Tool (Filters, Text, and Stickers)
Once you’ve perfected the image with the previous tools, it’s time to add the finishing touches. The Effects Tool helps you enhance your AI-generated image. You can add filters, text, and stickers or graphics. These tools help you add personality and style to your image. They turn it into a full marketing asset.
The Effects Tool has many features. You can adjust colors, add text overlays, and use decorative elements. You can also pick from different filters to set the mood of your image.
Other than this, you can add text to describe your product. Additionally, include branding elements like logos and captions. This gives your image a polished look. It’s great for ads, social media posts, and more.
Example Workflow
- Imagine you’re preparing an Instagram ad for a new product launch. You apply a vibrant filter to enhance the contrast and make the product stand out.
- Add a text overlay with the product name and price. Then, insert a small logo sticker to keep branding consistent.
This makes your AI-generated image look polished and professional. Now, it’s ready to share on different platforms.
Use these tools, AI image editing, AI image restoration, and manual corrections. They can help you make your AI-generated visuals look polished and professional. This way, you can meet your specific needs. These tools let you resize, fix distortions, and add creative effects. You can take control to create stunning visuals that grab attention.
Restoring Damaged or Low-Quality AI Images

AI-generated images may look grainy, pixelated, or discolored. But, with the right tools and techniques, you can fix them and bring out their best quality. Here’s how you can enhance and correct your AI images for a more polished and professional look:
1. AI Image Restoration Tools:
- Several AI-driven tools can help with image restoration. Let’s enhance and Remini boost the resolution and sharpness of AI visuals. They use machine learning to sharpen blurry images. This makes your photos look crisp and clear.
- Typeface’s “Auto-Edit” feature is great for fixing lighting and color balance. It helps make your images look more natural and vibrant.
These AI tools are a quick and effective way to fix your AI-generated images and correct any flaws.
2. Manual Restoration Techniques:
- AI tools are strong, but manual editing is key for precise tweaks. Photoshop has two great tools: the Healing Brush and the Clone Stamp. You can use them to fix tiny problems like grainy spots or unwanted artifacts. These tools allow for more control over the restoration process.
- To restore color, change layers like “Curves” and “Color Balance.” They help improve the image’s color accuracy and brightness. These manual techniques ensure the final result matches your vision. This is especially important for professional use, where even the smallest details count.
You can get great results by using AI image restoration tools along with manual editing. This way, you can fix your AI generated images to fit your needs, whether for marketing, design, or personal use.
Fixing Common AI-Generated Image Errors
AI-generated images aren’t always flawless. Sometimes, they include unnatural textures, distorted reflections, or inconsistent backgrounds. To fix your AI-generated images, you need a mix of AI image editing tools and manual corrections. Here’s how to handle the most common issues effectively.
1. Uneven Skin Texture
AI often has a hard time with human skin. It can make skin look too smooth, like plastic, or too rough and unnatural. To achieve a realistic skin texture:
- Use AI image editing tools like Let’s Enhance or Remini. They help refine details without making images too smooth.
- In Photoshop, use the “Smooth” tool on a low setting. This helps remove grainy patches but keeps natural pores intact.
- Apply the Gaussian Blur filter with a light mask. This will soften rough textures while keeping the skin looking natural.
- Use a high-pass filter with low opacity. This helps restore fine details and keeps a natural look.
2. Imperfect Reflections
AI reflections on surfaces like mirrors, windows, or water can be blurry or misaligned. Sometimes, they might even be missing. Here’s how to fix them:
- If the reflection is missing or off, duplicate the subject. Flip it and adjust the opacity. This will create a more natural mirrored effect.
- Use the Liquify and Warp tools in Photoshop. They help adjust the reflection’s shape. This way, you can match the real-world perspective.
- AI image restoration tools can rebuild accurate reflections. They do this by looking at the surrounding areas.
3. Disjointed Backgrounds
AI can create backgrounds that clash. You might see mismatched colors, odd shadows, or even blank spots. To correct your AI images and fix these issues:
- Use Content-Aware Fill in Photoshop to blend out-of-place sections into the surrounding areas.
- Use AI tools like Runway ML or DALL-E Outpainting. They help extend and refine backgrounds smoothly. This way, you avoid abrupt transitions.
- If shadows or lighting seem off, adjust brightness, contrast, and saturation. This will help to unify the elements.
To make your AI-generated images look natural and professional, use a mix of AI image restoration software and manual editing. This approach helps to achieve a cohesive final result.
Ensuring Brand Consistency in AI Image Editing
Using AI image editing for marketing is great, but keeping a consistent brand identity is key. Every visual—ads, websites, or social media- should show your brand’s colors, style, and look. Typeface’s Brand Kit makes it easy. It ensures all AI images match your visual style.
1. Benefits of Using a Brand Kit
A Brand Kit helps businesses create consistent visuals. This way, they don’t have to edit each image by hand. Key advantages include:
- Color Consistency: AI image editing keeps all visuals in line with your brand’s color palette. This helps you maintain the right tone and a professional look in your marketing materials.
- Lighting and Texture Control: It adjusts shadows, highlights, and textures automatically. This creates a balanced, natural look. This eliminates harsh contrasts or unrealistic lighting in AI-generated images.
- Faster Edits: Predefined styles make AI image restoration easy. This cuts down on manual fixes and gets you high-quality visuals faster.
AI Images Restoration improves old visuals with brand-aligned edits. This keeps all assets looking cohesive.
2. Setting Up a Brand Kit in TypeFace
To correct your AI images and maintain brand consistency, follow these steps:
- Upload Your Brand Assets: Bring in key items like logos, fonts, and color palettes to the Typeface Brand Kit. This ensures every AI-generated image aligns with your brand’s identity and aesthetics.
- Define Image Styles: Adjust lighting, shadow strength, and texture choices for a uniform appearance. This prevents inconsistencies in AI images restoration and keeps visuals polished and professional.
- Turn on Auto-Styling: This will apply branding presets automatically to all your AI image editing projects. It saves time, cuts down on manual changes, and makes sure every design meets brand standards easily.
Integrating a Brand Kit with AI image editing helps businesses quickly fix AI-generated images. This way, every visual matches their branding without the hassle of manual changes.
Finalizing Your AI-Enhanced Image
Once you’ve refined your AI image, choosing the right export format is crucial. The right format keeps quality high, maintains details, and helps with future AI image editing or restoration.
1. PNG/JPEG for Web Use
PNG maintains transparency and high quality, while JPEG offers smaller file sizes for faster loading. Choose based on your AI image editing needs.
2. PSD for Manual Adjustments
Exporting as a PSD file allows for non-destructive editing. Layers remain intact, making it easier to fix your AI generated images in Photoshop.
3. TIFF for High-Quality Prints
This format keeps image quality with lossless compression. It’s great for restoring AI images and for professional printing. You get to keep detail and color accuracy.
Conclusion: Achieve Perfect AI Image Results with Combined Techniques
AI image editing offers unmatched speed and creative potential. However, combining AI-generated content with manual adjustments leads to superior results. By understanding common AI image flaws, using powerful tools like Typeface, and applying expert manual techniques, you can create flawless visuals that elevate your brand’s content.
Whether you’re fixing AI-generated portraits, improving product photography, or designing captivating social media posts, this hybrid approach unlocks the best of both worlds. Dive into AI image editing today and discover how combining technology with creative expertise can produce remarkable visual results.