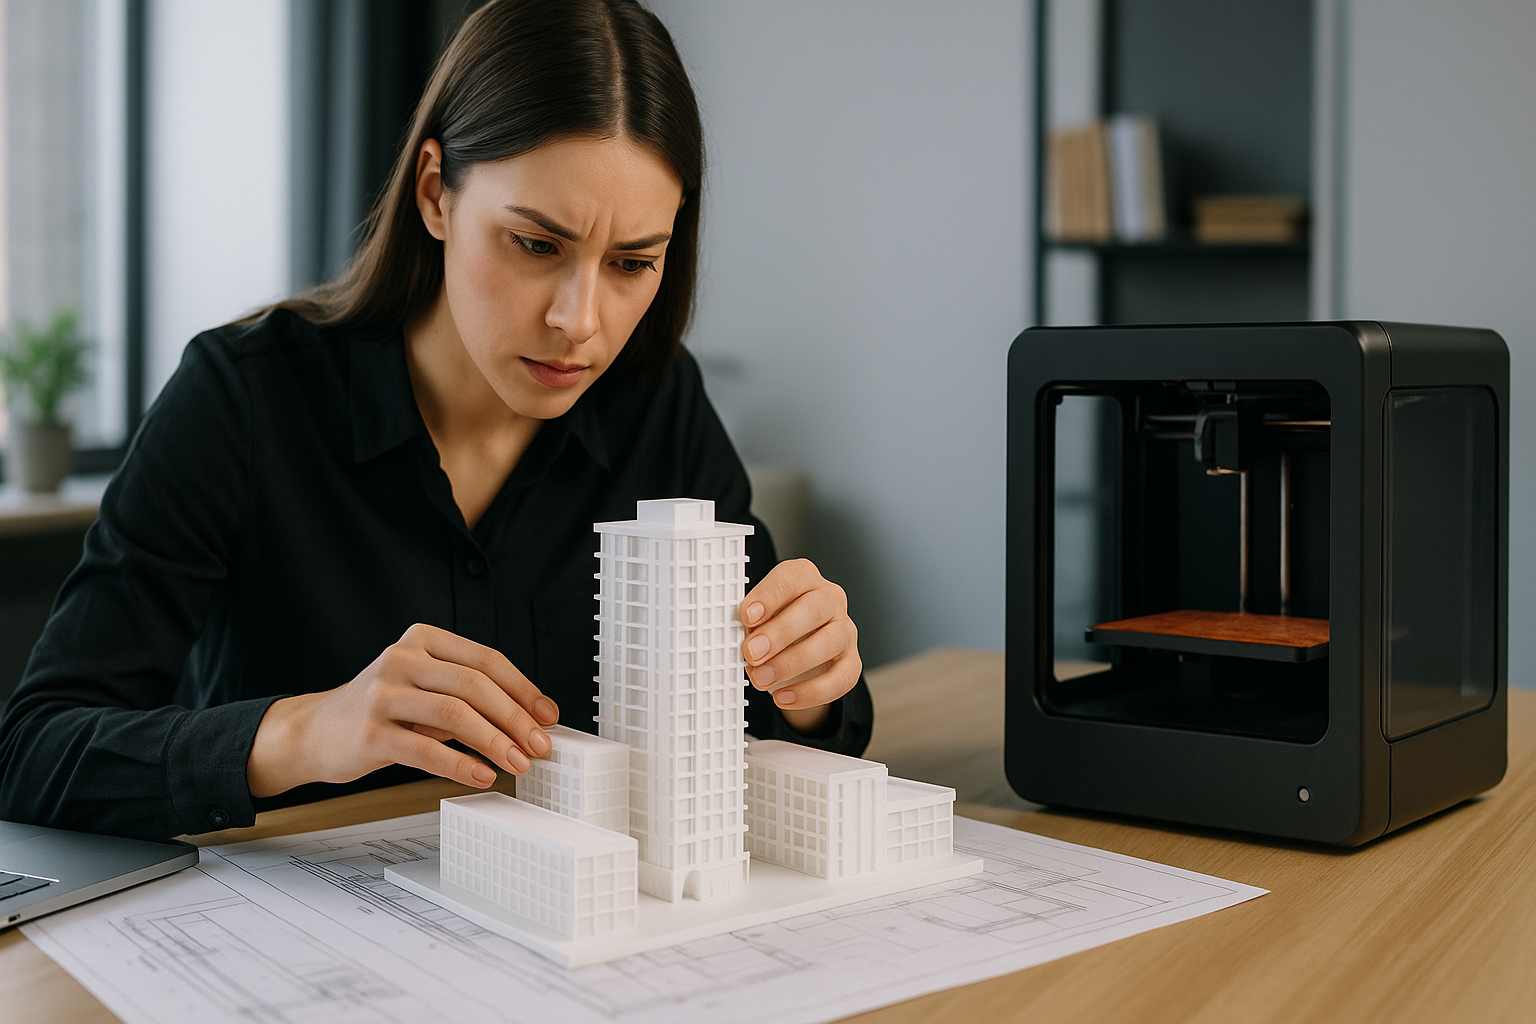
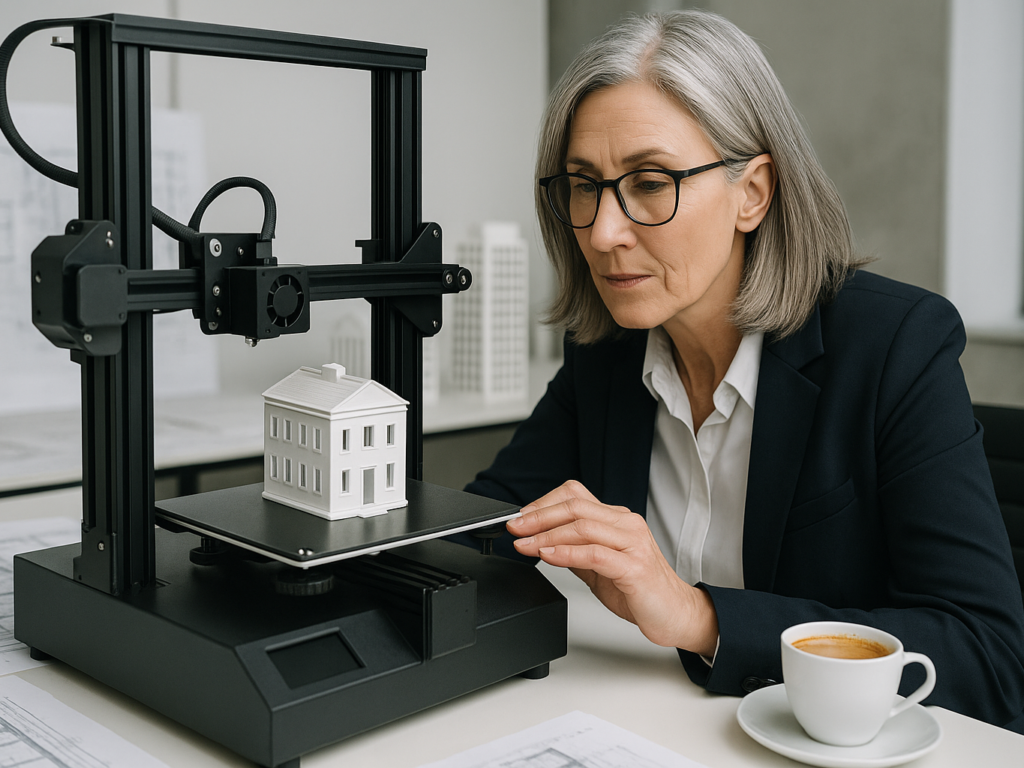
The New Era of Architectural Model Making
3D printers have totally flipped the script for architects. What once took weeks of cutting, gluing, and guesswork? Now done in hours. Architects and students can create amazing, detailed scale models using only a digital drawing. No X-Acto knife is needed.
Using the right 3D printer for architectural models means your designs look sharper, more professional, and way more accurate. And the range? Wild. From small $3,500 desktop printers to large machines over $100,000, there’s a printer for every budget and skill level.
Each type of printer brings something unique:
- Stereolithography (SLA) gives super-fine detail.
- Fused deposition modeling (FDM) is budget-friendly and fast.
- Selective laser sintering (SLS) handles complex shapes like a professional.
This guide? It will walk you through it all, how to pick the best tech, compare costs, and decide whether to buy or outsource your 3D printing. Let’s build something incredible.
What to Look for in a 3D Printer for Architectural Models
Choosing the right 3D printer for architectural models depends on several factors that affect output quality and workflow efficiency. A good printer needs to balance precision, build size, material options, and maintenance needs to match your requirements.
1. Print Precision and Detail Resolution
Print resolution determines how well your architectural models will show your designs Resolution is measured in microns (0.001mm). Lower numbers mean higher resolution and better detail.
Professional architectural models need high precision to show fine elements like:
- Staircases and railings
- Textured facades
- Window frames and other small architectural details
SLA (stereolithography) printers give the highest resolution and accuracy among plastic 3D printing technologies. These resin-based machines create models with smooth surfaces that need minimal finishing. SLA technology produces exceptional results with layers as fine as 0.025mm for detailed presentation models that will wow your clients.
FDM (fused deposition modeling) printers are more common at the consumer level but have lower resolution and don’t handle fine details well. They work well for simple concept models early in design.
2. Build Volume Considerations
Build volume sets the maximum size of objects your printer can make. This affects what kinds of architectural models you can create. Bigger build volumes let you:
- Create complete building models without splitting
- Make site context models with surrounding buildings
- Keep proper scale for detailed city planning models
Most 3D printers have built areas between 6 and 9 inches square. Some range from a few inches to more than two feet on each side. The scale of your work and whether you’ll need to print models in sections should guide your choice.
Large-format printers like the Modix BIG-Meter V4 offer huge build volumes up to 1010mm × 1010mm × 1010mm. These are perfect for large-scale architectural models that don’t need splitting.
3. Material Compatibility and Options
Each architectural model needs specific materials based on how it will be shown, how durable it must be, and what finish quality you want.
Common materials include:
- PLA: Prints easily, biodegradable, shows good detail, but tends to break easily.
- ABS: More flexible and tough, but releases fumes when heated and needs a heated print bed.
- Resin: Shows very fine details but costs more.
- Specialty filaments: Wood, metal-infused, or other materials for unique finishes.
Materials also determine color choices and finishing options. SLA parts have smooth surfaces that take paint well. Binder jetting can make full-color models, but they’re more fragile.
4. Speed and Software Ease-of-Use
Print speed affects workflow efficiency, especially when you’re testing design concepts or meeting tight deadlines. Materials like Draft Resin make SLA the fastest 3D printing method for most parts.
Software that’s easy to use makes a big difference in your printing experience:
- Modern CAD platforms have built-in 3D printing tools that make it easy to prepare designs.
- Slicing software like PreForm spots potential issues such as thin walls that need reinforcement.
- Accessible interfaces help students and beginners learn quickly.
Look for printers with mobile apps for monitoring and desktop software for model preparation. Some printers, like the Bambu Lab A1 Mini, are set up easily without complex configuration.
5. Maintenance Requirements and Noise Levels
Your long-term satisfaction with a 3D printer depends on its maintenance needs and how it operates. Here’s what to think about:
Regular maintenance includes:
- Cleaning the build plate with isopropyl alcohol for good adhesion.
- Lubricating moving parts to reduce wear.
- Checking belt tension to avoid print defects.
- Updating firmware to improve performance and fix bugs.
Noise levels vary between models and can be a problem in shared spaces. Enclosed or insulated printers run more quietly. Some printers have features that reduce vibration noise during operation.
6. Best 3D Printer for Architecture Students
Architecture students need reliable, affordable printers that give good quality without breaking the bank. The best student printers offer:
- Easy-to-use interfaces that don’t need much technical knowledge
- Reliability for frequent use in academic projects
- Affordable materials for multiple iterations and experiments
Desktop SLA printers fit well in small spaces while giving high-quality prints. FDM printers cost less to start with and work well enough for concept models.
Students should look for printers with active online communities and good support resources. This helps solve the learning challenges that come up. Educational printers usually balance cost, ease of use, and print quality in a way that works well for learning.
Top 3D Printers for Architectural Models in 2025
Your budget and intended use will largely determine the best 3D printer for architectural models. The 2025 market has options at every price point, and each category brings specific benefits to architects.
1. Budget-Friendly Options Under $300
Budget 3D printers have come a long way. They now pack features you’d only find in professional models. Students and small studios can get great value from these affordable options:
The Creality Ender 3 V3 SE ($218) makes a great starting point for architectural modeling. This budget-friendly printer has:
- Auto bed leveling technology that ensures consistent first layers
- LED interface that’s easy to use
- Auto filament loading to speed up your workflow
Speed-focused architects will love the Elegoo Centauri Carbon ($299). It prints at speeds up to 500 mm/s. The printer comes pre-assembled – perfect for students or firms just starting with 3D printing.
The Bambu Lab A1 mini ($249) brings multi-color printing at a great price. This feature helps architects create models with color-coded sections to show different building elements.
2. Mid-Range Professional Printers ($300-$1000)
Moving up to the $300-$1000 range opens up many more possibilities. These printers deliver better print quality and work with more materials:
The Anycubic Photon Mono M7 Max ($799) takes a big step up in build volume and detail. This resin printer creates highly detailed architectural elements like complex facades and scaled interior parts.
Architects working on bigger projects should look at the Elegoo Neptune 4 Plus ($398). It has extra build volume that’s perfect for large architectural models. You can experiment with different textures using its wide range of compatible materials.
Printers at this price point work with more materials, too. Most can hit nozzle temperatures around 300°C, so you can use special filaments that look and feel like building materials.
3. High-End Studio Printers ($1000-$5000)
Professional studios should invest in premium printers that deliver precision and reliability:
The Bambu Lab H2D ($1899) leads the pack with innovative dual-nozzle technology. It supports multiple materials – vital for complex architectural models. The printer levels itself and has plenty of build space for detailed client presentations.
Looking for ultra-fine details? The Formlabs Form 3+ creates models with excellent surface quality and accuracy. It costs more but delivers SLA workflow solutions that architectural visualization demands.
These premium printers typically come with:
- Enclosed chambers that keep temperatures stable
- Dual extruders for support material printing
- Advanced software that works smoothly with CAD
Printers between $1000-$5000 also save time with better features. The improved software works without issues, letting architectural firms focus on design instead of fixing printer problems.
4. Industrial-Grade Systems for Large Firms
Big architectural practices need industrial systems for full-scale models. These machines offer massive build volumes and work with any material:
The BigRep STUDIO has a massive 1000 x 500 x 500 mm build chamber. Architects can print large models in one piece. That’s 10 times bigger than desktop printers – perfect for urban planning models or detailed building sections.
Need even more space? The BigRep PRO gives you a 915 x 805 x 874 mm build chamber with dual extrusion up to 280°C. You can print complex architectural forms using industrial materials.
The top-of-the-line BigRep ALTRA 280 brings unmatched reliability with up to four cutting-edge extruders. It handles high temperatures perfectly for architectural models that need structural strength and smooth finishes.
Industrial systems also pack automation features that big firms need:
- Auto bed and extruder calibration
- Multiple extrusion options for complex models
- Heated chambers for optimal printing
Think over your modeling needs before buying any printer. Remember to plan for growth as your architectural practice expands.
Understanding 3D Printing Technologies for Architecture
The quality and utility of architectural models substantially depend on the basic differences between 3D printing technologies. Your choice should go beyond price or brand. Understanding the technology helps you match printing capabilities with specific architectural needs.
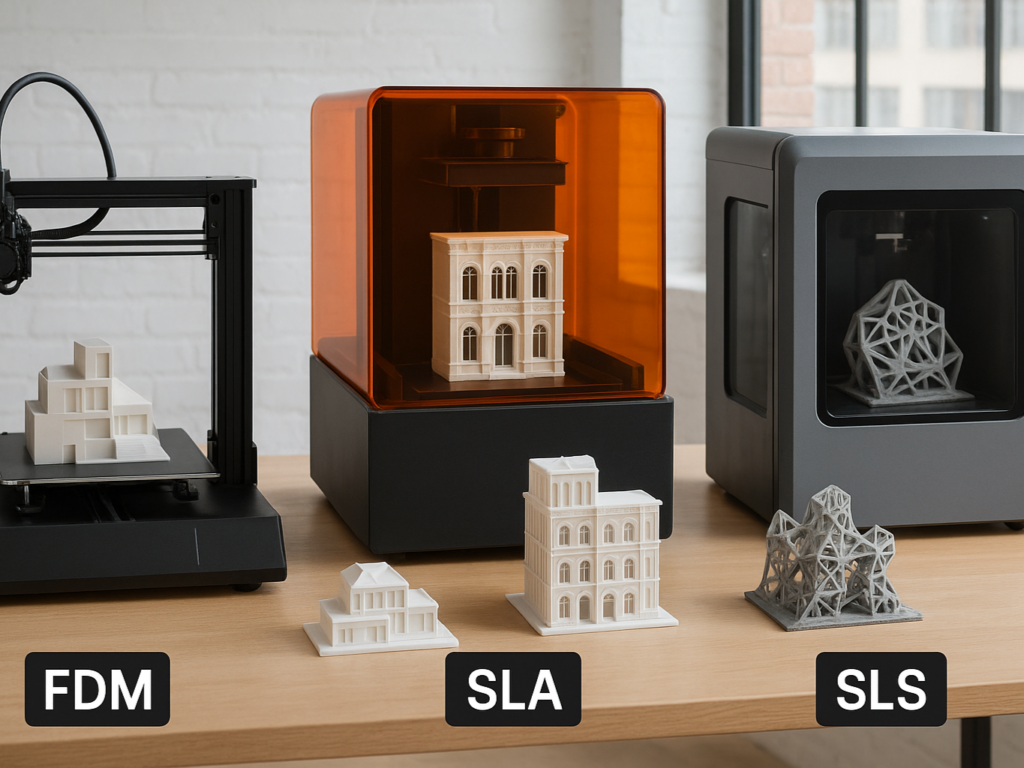
1. FDM vs. SLA vs. SLS: Which Technology Fits Your Needs?
Each of the three dominant technologies in architectural 3D printing brings unique advantages:
Fused Deposition Modeling (FDM/FFF) works by melting and extruding thermoplastic filament layer by layer. This most available technology makes FDM perfect for:
- Simple concept models during the original design stages
- Large models are produced quickly at low cost
- Simple massing studies and form exploration
All the same, FDM has the lowest resolution and accuracy among the three technologies, which makes it less suitable for complex designs or intricate features. Desktop models of FDM printers typically come with build volumes up to 300 x 300 x 600 mm.
Stereolithography (SLA) uses a laser to cure liquid resin into hardened plastic through photopolymerization. SLA, first invented in the 1980s, delivers:
- The highest resolution and accuracy of all plastic 3D printing methods.
- Smoothest surface finish that needs minimal post-processing
- Exceptional detail for presentation models
SLA parts excel at showing intricate architectural elements like façade details, interior features, and complex geometries. Desktop SLA printers typically come with build volumes up to 353 x 196 x 350 mm.
Selective Laser Sintering (SLS) employs a high-powered laser to fuse small particles of polymer powder. This industrial-grade technology provides:
- Excellent mechanical characteristics, like injection-molded parts
- No need for support structure,s as unfused powder supports the print
- Superior capability for complex geometries, undercuts, and thin walls
SLS proves especially valuable for functional prototypes or architectural elements that need structural integrity.
2. Resin-Based Printers for Ultra-Fine Details
Architectural visualization has seen resin printing technology become vital due to its unmatched precision. SLA printers offer several key advantages:
The liquid resin solidifies under light exposure and creates a smooth, detailed surface finish that accurately shows finished architectural elements. This precision matters greatly during client presentations.
Resin printers typically achieve layer heights as fine as 0.025mm, which allows reproduction of minute architectural details like decorative elements, staircases, and window frames.
Unlike other technologies, resin-based printers excel at producing complex geometric shapes with sharp edges and thin walls. This capability becomes essential when modeling contemporary architectural designs with intricate façade patterns or structural elements.
3. Filament Printers for Durability and Size
FDM technology, despite detailed limitations, offers compelling advantages for specific architectural applications:
FDM printers support many materials beyond standard PLA and ABS, including wood-infused, carbon-fiber reinforced, and flexible filaments. Architects can create models with varying textures and physical properties thanks to this material’s versatility.
The durability of FDM prints makes them perfect for working models that see frequent handling or functional testing. The relatively low material costs (USD 50-150/kg for most standard filaments) make iterative design exploration cost-effective.
Large-scale architectural models benefit from FDM technology, where overall form and proportion matter more than fine detail. FDM creates large models quickly and economically during original design phases.
Architecture students and small firms starting to explore 3D printing find FDM technology’s simplicity more available as part of their workflow.
Cost of 3D Printing Architectural Models

The cost implications of 3D printing architectural models help architects make smart decisions about buying equipment or outsourcing work. The expenses change based on factors like material choice, how many models you need, and their complexity.
1. Material Costs Breakdown (PLA, Resin, etc.)
Materials used in 3D printing architectural design models make up much of the ongoing costs. Different materials come with their price tags and quality features:
- Standard Filaments (PLA/ABS): These thermoplastics cost between $20-$70 per kilogram and work well for simple concept models, though layer lines show more
- Professional Resins: Standard formulations start at $50 per liter and go up to $300 per liter for specialty materials. These give better detail but cost more.
- Industrial Materials: High-end materials can cost over $100 per kilogram.
Materials matter even more with bigger architectural models. To cite an instance, a detailed building model might need several hundred grams of material. This means the price gap between filament and resin adds up over time.
2. Time-Based Pricing Considerations
Time is money, especially in 3D printing. Whether you’re printing at home or hiring a service, the clock matters. Most architectural 3D printing services charge around $10–$50 per hour. That fee covers everything: machine wear, upkeep, electricity, labor, and even the printer’s long-term cost.
So yeah, even simple models can surprise you with higher-than-expected prices.
Here’s what that hourly cost usually includes:
Electricity + Materials + Maintenance + Labor + Printer depreciation + Overhead
If your model is super complex and takes hours to finish, the cost racks up quickly. That’s why many services set a minimum fee, usually between $30 and $90, even for tiny prints. Because no matter how small your model is, the setup time is still the same.
So when you’re budgeting, keep in mind: 3D printing architectural models costs more than just the filament. It’s about time, tools, and technique.
3. Design-to-Print Fees for Architectural Firms
Professional 3D printing services for architecture often use pricing tiers based on design complexity:
Simple pricing starts around $8 per square meter for exterior elements and $16 per square meter for interior details. These rates change based on what each project needs.
Companies that do architectural visualization look at several things to set their fees:
- Views and rooms needed
- Project complexity and special features
- Time requirements and rush orders
- Post-processing work (painting, finishing)
Companies handling everything from modeling to printing charge more than those that just print files you give them. The modeling alone costs between $250 for simple floor plans and $5,000 for complex models with lots of features.
4. ROI Analysis: When to Buy vs. When to Outsource
The choice between buying a printer or outsourcing needs careful money analysis:
Buying a 3D printer pays off in about 2 years if you use it regularly. The big upfront cost makes parts more expensive in year one, so outsourcing looks cheaper for short projects.
Let’s compare:
- In-house printing: Costs more upfront ($200-$150,000 depending on technology) but parts cost nowhere near what outsourcing charges – up to 94% less.
- Outsourcing: No equipment cost, but higher part prices and sometimes longer wait times.
The decision involves more than just money:
- Projects that come and work better with outsourcing’s pay-as-you-go model.
- You get expert help and advanced tech without training your team.
- The ability to handle big or multiple projects at once.
Companies that need 3D printing all the time will reach a point where buying equipment costs less than outsourcing. But firms with changing needs or those wanting different technologies might get better value from outsourcing’s flexibility.
Alternative Option: Architectural 3D Printing Services
Your architectural firm might not need its 3D printer. Many practices find that specialized architectural 3D printing services provide a practical alternative. These services give you access to top-tier technology without equipment investments.
1. When to Use External 3D Printing Services
These services make perfect sense in several scenarios:
- Short-term project needs – Service bureaus are budget-friendly solutions for short-term design phases.
- Variable production requirements – Pay-as-you-go services help you manage cash flow better when workload changes.
- Complex or large-scale models – One-off presentations that need specialized equipment beyond your in-house setup.
- Technology exploration – You can test different printing technologies before buying equipment.
- Remote client locations – Local service providers near your clients improve logistics significantly.
Businesses unsure about their long-term model printing needs can avoid fixed equipment costs by outsourcing.
2. Finding Reliable Service Providers
Look for these key factors when choosing a 3D printing service:
The provider’s expertise in architectural visualization comes first. Most service providers employ skilled technicians. They know how to optimize designs for 3D printing. This expertise leads to better-quality models.
Their technology range matters, too. A 5-year-old provider typically offers multiple printing technologies (SLA, FDM, SLS) and materials. These options would be impractical for a single firm to maintain.
Sample prints help you verify quality and compatibility with your design requirements before larger projects.
3. Cost Comparison: In-House vs. Outsourced Printing
The numbers tell an interesting story about outsourcing versus in-house production:
Outsourced printing takes about one week from design quote to final prototype delivery. This lead time means you will receive half the prototypes in a 10-week project compared to making them in-house.
In-house printing ends up being cheaper for consistent needs. You’ll pay 94% less per part with your printer versus outsourcing. Most architectural firms see returns on their printer investment in about 2.0 years.
Outsourcing eliminates maintenance headaches, technology obsolescence risks, and equipment management complexities. Smaller firms and those focused on core design really like this simplicity.
Tips to Get the Best Results from Your 3D Architectural Prints
Quality 3D printing of architectural models goes beyond just having the right equipment. You should learn key techniques to make your models look professional. This will showcase your design vision.
1. Designing with 3D Printing Limitations in Mind
Your CAD models will print better with careful preparation. Large models are best when divided into smaller parts. You can then assemble them after printing. This makes it easier to handle and allows for smaller printers with limited build space.
Innovative design strategies include:
- Building in features that help parts line up on their own.
- Breaking down models by structural elements to make assembly easier.
- Making straight cuts that create simple, perfectly fitting joints.
2. Calibration and Maintenance Best Practices
Your print quality stays consistent with proper upkeep. Regular cleaning of the build plate with isopropyl alcohol helps parts stick better. You should wipe dust off linear rods and rails each month to keep movement smooth.
Look for loose nuts and bolts, and check belt tension since these affect how precise your prints turn out. Check the extruder feeder wheels for debris. Buildup can disrupt filament flow.
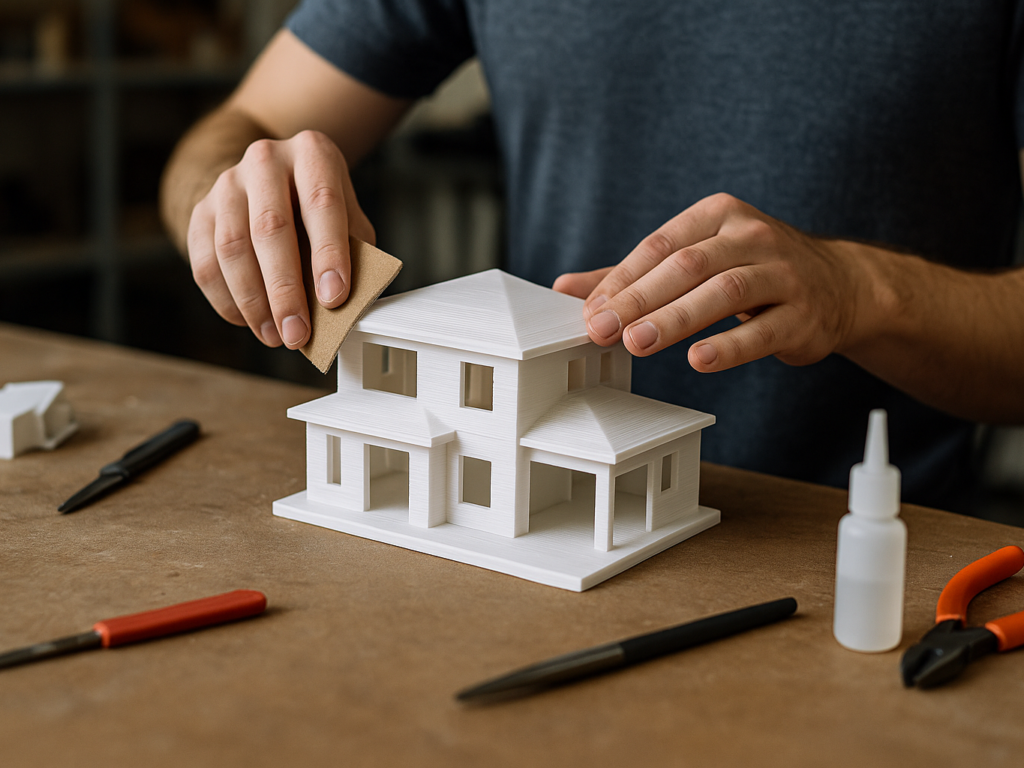
3. Post-Processing Techniques for Professional Finishes
Every printing method needs its finishing touches. However, sanding, bonding, and painting are common steps. SLA parts need light sanding to clean up support marks. FDM prints usually need more sanding work to get smooth.
Super glue bonds parts well with any technology. The parts must line up in a precise manner to create smooth joints between assembled pieces.
4. Adding Color and Texture to Your Models
Materials make a big difference in showing design concepts. You don’t need to match textures with complete accuracy. Sometimes, showing the difference between materials works well.
Tips for detailed color work:
- Use texture mapping with UV coordinates to add logos or mimic materials.
- Test texture patterns at about 4 HPI for the best look.
- Keep texture depth around 1 mm for most architectural projects.
Different-colored components help to show material changes and simplify complex architectural elements.
Conclusion: Bringing Your Architectural Designs to Life
3D printing has completely transformed how architects bring their ideas to life. With incredible precision and speed, it simplifies the entire model-making process. Now, architects can create detailed scale models in a fraction of the time it used to take. All it takes is choosing the right 3D printer for architectural models and using innovative techniques to get professional, polished results.
This piece highlights several important points:
- Each technology has a specific role. SLA printers excel at detail, while FDM offers affordable options for basic models.
- Students and small businesses can find good 3D printing choices starting at $300.
- For client presentations, you need professional printers. They cost between $1,000 and $5,000. These printers provide high precision.
- Material costs vary widely. Basic filaments cost about $20 per kilogram. In contrast, specialty resins can reach $300 per litre.
- Good print quality relies on proper calibration and regular maintenance.
Your specific needs determine whether to buy equipment or use printing services. Most firms see returns on printer investments within two years. It is true when they need models regularly. Occasional users find more value in outsourcing their printing needs.
A solid grasp of printer technologies, materials, and upkeep requirements helps you get the most value from your investment. The right tools can make your architectural ideas come to life. You can either print them in-house or partner with a service provider. Your success depends on choosing the right tools and mastering skills that bring designs to life.