Hey there, future 3D printer master! So, you want to learn how to create 3D models for 3D printing? Smart move. But let’s be real, figuring out the right tools can feel like building IKEA furniture without directions.
No worries, I got you. The correct software makes all the difference, whether you’re making a bespoke phone stand, modeling a 3D printer for a Morse code coin, or recreating your missing TV remote cover (we’ve all been there).
And guess what? You don’t need a PhD in rocket science. I’ll walk you through the best free & paid 3D modeling software for 3D printing, no boring tech jargon, just the fun and useful stuff.
Strap in. This is going to be good.
What’s the Big Deal About 3D Modeling for Printing?
Think of 3D modeling like sculpting, but instead of using clay, you’re turning digital bits into something your 3D printer can actually bring to life. It’s fun, it’s artistic, and yes, it can be stressful. (Trust me, the first time your model prints as a spaghetti mess, you’ll know what I mean.)
But here’s the cool part: once you nail it, you can create anything, custom phone cases, detailed figurines, spare parts for broken gadgets, and even a 3D printer model for a Morse code coin. The possibilities are endless.
Now, let’s get real for a second. Creating 3D models for 3D printing isn’t just about clicking buttons. You need:
- The right software (because not all are beginner-friendly).
- A good understanding of dimensions and tolerances (your print needs to fit together).
- A printer that doesn’t decide to betray you mid-print.
And here’s a pro tip: Not every 3D modeling software for 3D printing works the same way. Some are simple drag-and-drop, others make you feel like an engineer at NASA. But don’t worry, I’ll help you find the best tools, whether you’re a total newbie or ready to print your own Iron Man suit.
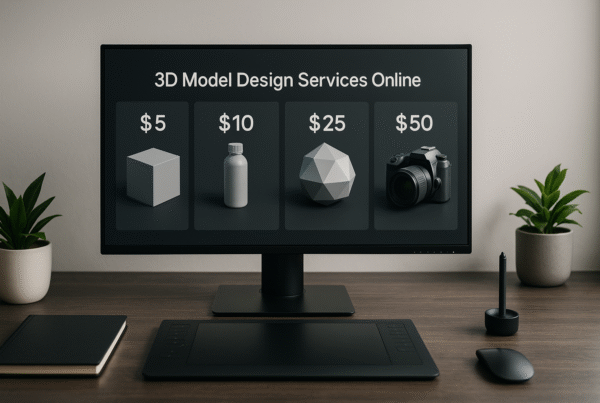
Free vs. Paid Software: Do You Really Need to Spend Money?
Short answer? Not always. If you’re just starting out, stick to cheap choices. But if you’re serious about making jaw-dropping designs, investing in paid tools might be worth it. Here’s what you should know:
- Free Software: Great for beginners. Some come with limitations, but hey, free is free.
- Paid Software: More functions, fewer limits, but also… your pocket might cry.
Best Free 3D Modeling Software for 3D Printing
Alright, let’s talk about free stuff. Who doesn’t love free?
1. Tinkercad
Super easy. Drag, drop, boom! You got yourself a 3D model.
2. Blender
Not just for animation. With some practice, it’s a powerhouse.
3. Fusion 360 (Personal Use)
Free for hobbyists, powerful like a paid tool.
4. Meshmixer
Great for fixing and editing 3D models.
5. FreeCAD
Open-source and full of customization options.
Did I mention that the best free 3D printing modeling software for iPad exists? Yup, and we’ll get to that.
Best Paid 3D Modeling Software for 3D Printing
If you want the premium experience, check these out:
1. AutoCAD
Industry-standard, but pricey.
2. ZBrush
Sculpting like a pro (seriously, it’s amazing).
3. SolidWorks
For engineers who take things seriously.
4. Rhino 3D
Great for complex, organic shapes.
5. Fusion 360 (Commercial Use)
If you plan to sell your designs.
How to Create 3D Models for 3D Printing
First, don’t panic. Seriously. It’s easier than you think. Just follow these steps:
1. Choose your Software
There are tons of 3D modeling software for 3D printing (some easy, some… not so much). Pick one that matches your skill level.
2. Start with Simple Shapes
Think of your model like LEGO blocks. Begin with basic shapes and gradually refine them into something cool.
3. Learn About STL Files
STL is the magic file format that tells your printer, “Hey, print this!” Without it, your model is just a pretty digital sculpture.
4. Make Sure Your Design is Watertight
No holes, no gaps, no floating parts. If your model isn’t solid, your printer will have a meltdown (and so will you).
5. Test Print Small Versions
Before you go all-in on a huge, time-consuming print, start small. A mini version helps you catch mistakes without wasting hours (or filament).
Follow these, and you’re on your way to printing like a pro! 🎉
Best Free 3D Modeling Software for 3D Printing on iPad.
Not everyone wants to be glued to a PC. iPads are surprisingly well for 3D modeling. Here are the best options:
1. Shapr3D
Best for Apple Pencil users.
2. Nomad Sculpt
Perfect for sculpting models.
3. uMake
User-friendly and fun.
4. Onshape
Browser-based, works great on iPads.
Understanding 3D Printer Models: The Good, The Bad & The Ugly
Not all 3D printer models are created equal. Some are a dream to print, while others will make you question your life choices. So, before you dive in, here’s what you need to know:
1. Material Matters
Are you printing with PLA, ABS, resin, or something fancy? Different materials behave differently; some warp, some snap, and some even smell like burning plastic (because they are).
2. Printer Size Limits:
Your printer isn’t infinite. Check the build volume before designing something too big to fit. Otherwise, you’ll have to print in parts and glue them together like a puzzle.
3. Supports Are a Necessary Evil:
If your model has overhangs (like a T-shape), gravity will ruin your print unless you add supports. No support = spaghetti mess.
Before you hit “print,” make sure your model is actually printable. Unless you enjoy frustration.
3D Printer Model for Morse Code Coin: A Cool Project Idea
Ever wanted to 3D print your own secret message? A Morse code coin is a fun way to create a unique, personalized keepsake. Whether it’s a name, a date, or a secret phrase, here’s how you can make one:
1. Pick Your Software
Tinkercad (easy for beginners) or Fusion 360 (for more control). Both work great for designing simple objects like coins.
2. Shape Your Coin
Start with a basic circle or disc shape. Keep it smooth and even.
3. Add Morse Code
Instead of letters, use raised or engraved dots and dashes for the Morse code message. Raised symbols are easier to print, while engraved ones look sleek.
4. Export as STL
Save your design in STL format, the magic file type for 3D printing.
5. Print It!
Load your file into your slicer software, check the layer preview, and hit print. Want extra flair? Try metallic filament for that real coin-like finish!
And boom! You’ve got a custom Morse code coin that only true code-breakers can read.
How to Fix 3D Model Errors Before Printing
So, you’ve designed your 3D model, and you’re ready to print. But wait, your slicer is throwing errors, or worse, your print looks like a melted mess. What went wrong? Don’t worry, I’ve got you. Here’s how to clean up your model before it hits the printer:
1. Check for Holes & Gaps
If your model isn’t “watertight” (meaning it has holes or open edges), the printer won’t know what to do. Use Meshmixer or Netfabb to detect and seal these gaps.
2. Remove Non-Manifold Geometry
Sounds fancy, but it just means deleting weird overlapping parts that can confuse your printer. Again, Meshmixer is your friend.
3. Fix Wall Thickness
If your walls are too thin, your model might break. Too thick? Wasted filament. Aim for at least 1.2mm for strength.
4. Simplify Overly Complex Models
Too many polygons can slow down your slicer. Use a decimation tool in Blender or Meshmixer to reduce unnecessary details.
5. Double-Check File Format
STL is the king, but if you’re using OBJ or 3MF, make sure your slicer supports them.
Fix these, and your printer will love you. Ignore them, and you’ll end up with a failed spaghetti-print disaster.
Final Thoughts: Ready to Print?
So, there you have it! Now you know how to create 3D models for 3D printing, from choosing the right 3D modeling software for 3D printing to fixing common design errors. Whether you’re crafting a 3D printer model for Morse code coin or testing the best free 3D printing modeling software for iPad, you’re set for success. Remember, 3D printing is all about experimenting, learning, and having fun. Mistakes? They’re just part of the process. So fire up your printer, hit that print button, and bring your wildest ideas to life. Happy printing!